Your AltText.ai Account
The Account section lets you manage your account information, settings, billing plan, and other account-level features.
Settings
Here you can update global account settings such as your default alt text language, default ChatGPT prompt to apply to all generated alt text, your name and password information, erase your Image Library, and even delete your account.
Alt Text Generation
This section lets you control properties of the generated alt text. Values you set here will be applied globally to all generated alt text from our website, integrations, and API calls.
Note
Global settings can be overridden by our web UI, plugins, integrations, or on API calls if different values are specified in their configuration. For example, you may have your global language set to English, but configure the WordPress Plugin to always generate alt text in Spanish.
Maximum Alt Text Length
You can enforce a maximum length for any alt text generated, regardless of the AI writing style you are using. To set a maximum, just go to your Account Settings page, and look for the checkbox to "Enforce a Maximum Length". Check the box, and you will be able to set a limit on the number of characters:

Style and Level of Detail
Lets you control the tone of voice and amount of detail used in the generated alt text. If your images typically have a lot of small details that are all important (e.g. a chair with length, width, and height dimensions all listed), you may want to select the Detailed or Elaborate language model. For alt text that is more direct and to the point, choose either the Matter-of-fact or Concise language models.

- Elaborated: A tall suspension bridge stretches across a body of water with a sailboat below. The bridge casts long shadows on the blue water. In the background, a layer of fog partially obscures a mountainous landscape under a clear, blue sky.
- Standard: A sailboat glides through calm waters beneath a large suspension bridge enveloped by mist. The bridge's tall cables stretch skyward against a bright blue sky, while faint hills loom in the background.
- Matter-of-fact: A suspension bridge spans a body of water under a clear blue sky. There is light fog in the distance over the water. A small sailboat is seen sailing under the bridge. The bridge casts a shadow on the surface of the water.
- Concise: A large suspension bridge spans over a body of water with a sailboat underneath. The scene is partially enveloped in fog.
- Terse: A sailboat passes under a tall suspension bridge shrouded in mist, with a bright blue sky in the background.
API Keys
You will need API keys if you use any of our integrations (e.g. WordPress plugin, Shopify app, etc), or our Developer API. An API key ties the integration to your account, so when alt text is generated in the integration, the proper account data is used.
API Key Basics
You can create as many API keys as you want. Typically you will want an API key per integration, though it's perfectly fine to use the same key across many different integrations. When you use a key per integration, you are able to easily shut off access to that single integration if needed, as well as set limits on how many credits can be used each billing period.
Creating an API Key
To create an API Key:
- Go to the Account: API Keys tab.
- Click the + API Key button to make a new key.
Setting a Credit Limit
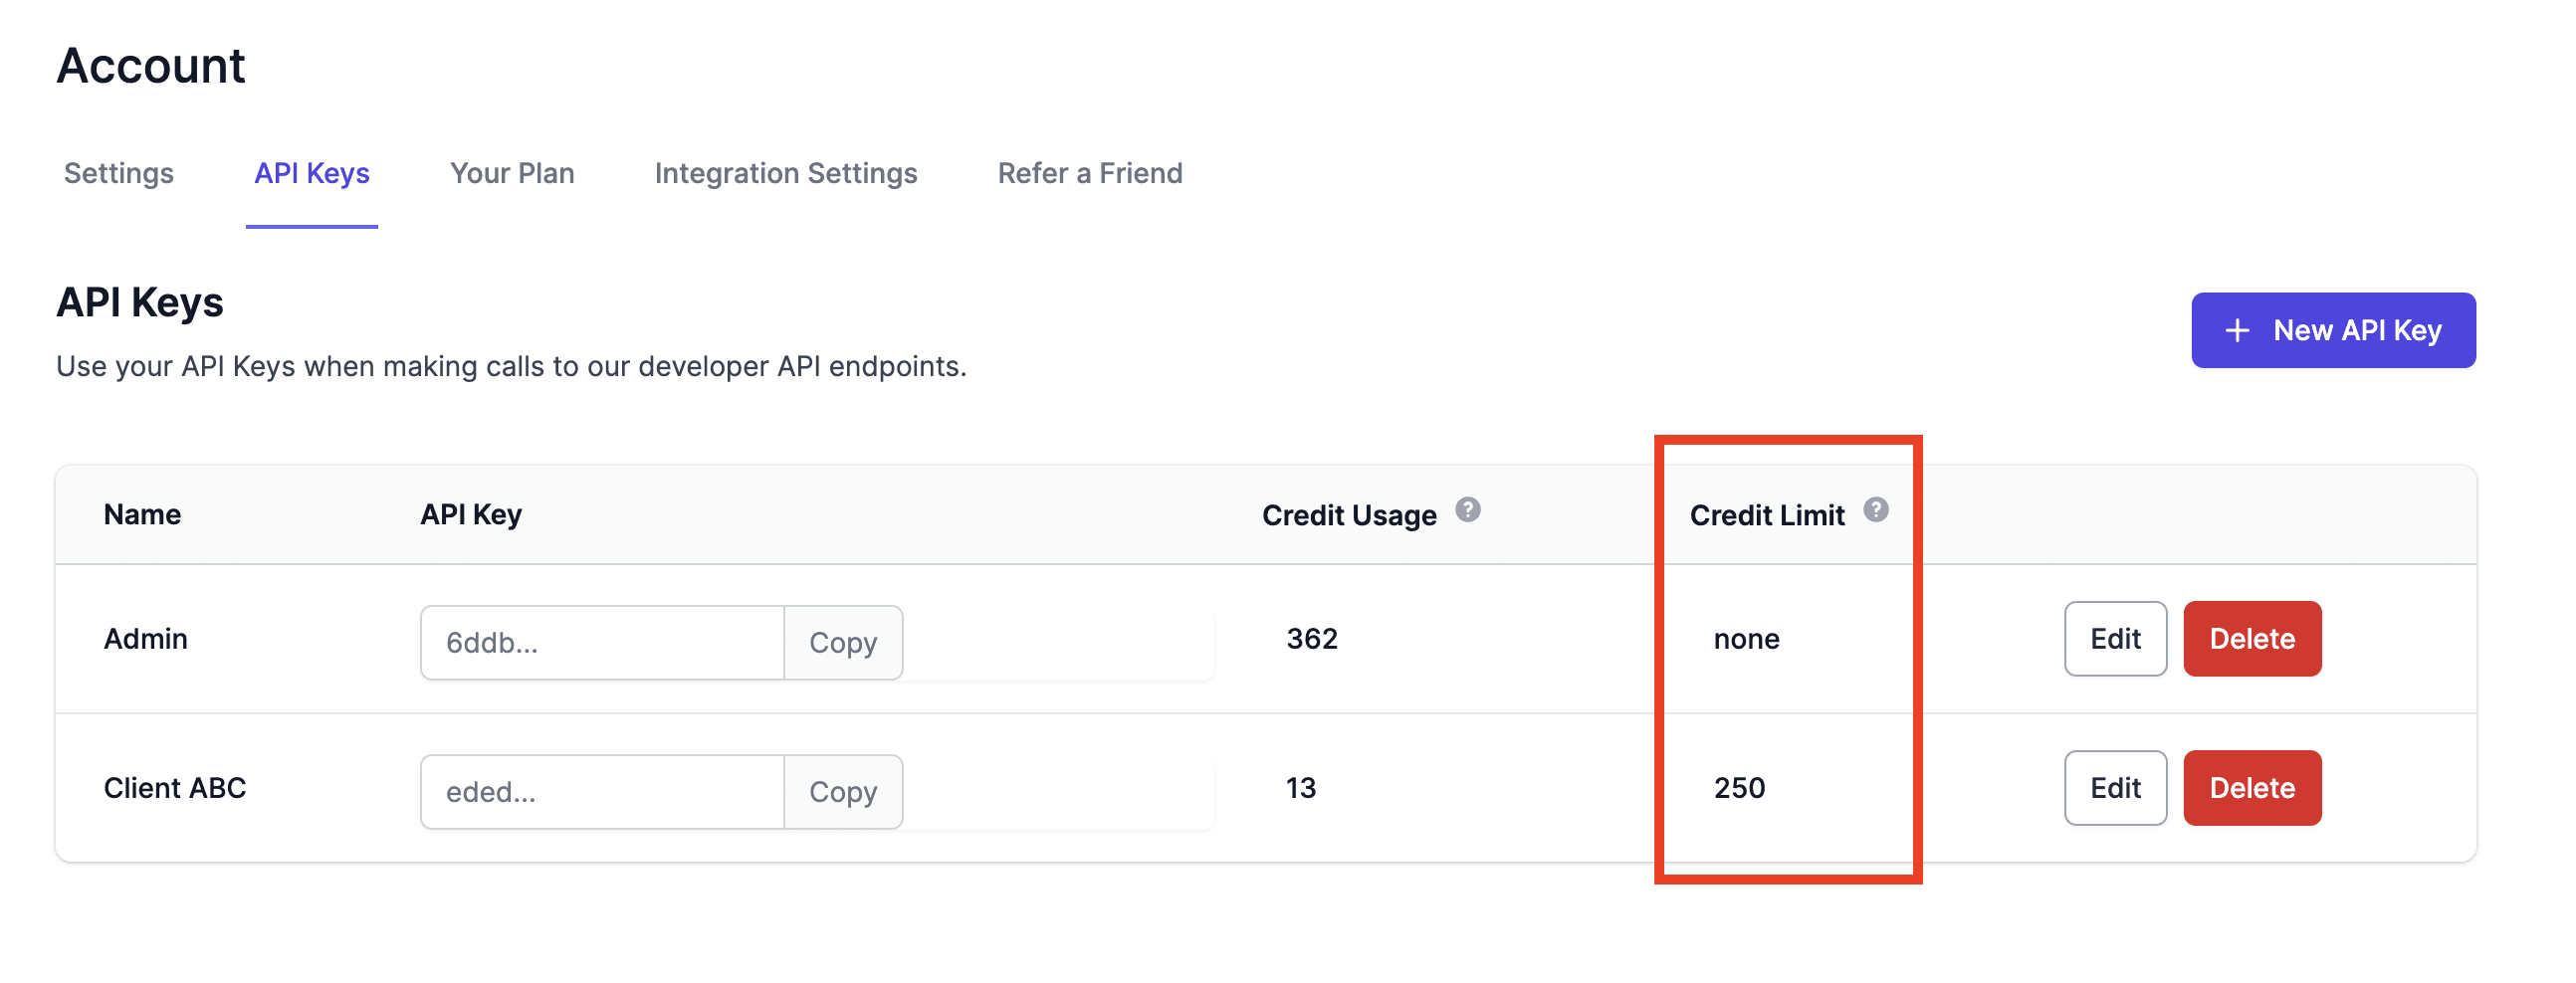
If you need to limit an API key's credits per billing cycle (or in total when not on a recurring plan), click the Edit button next to the API key. Set the maximum number of credits that can be used by the key, or leave the field blank for no limit.
Here's an example of an account with two API keys, one that is allowed unlimited usage, and another for a client site that is limited to 250 credits per billing period:

Billing and Payments
The Your Plan section lets you purchase and manage your subscription plan, as well as buy one-time credits packs as needed. If you are not currently on a plan, you can select whichever plan is best for your needs.
When you are already on a plan, you can use this section to upgrade, downgrade, and cancel your plan. Just click the Manage Plan link and you can modify your billing settings.
Note
All payments and plan changes are managed through Stripe, our billing and payment provider.